Photographing Ordnance A How To Guide
Once an item of military ordnance has been discovered, all attempts should be made to correctly identify it and the condition in which it was found. In many cases older ammunition that is being discovered at various locations are being incorrectly identified and then destroyed. Often, only a single photograph is taken prior to the disposal. In many cases the photograph is out of focus and without accurate measurements being taken.
The purpose of this article is to review proper procedures on how to photograph military ordnance for the purpose of identification. The information is presented for information purposes only. First a safety note: DO NOT MOVE OR DISTURB UNEXPLODED ORDNANCE OF ANY TYPE! RECORD ONLY THAT INFORMATION THAT CAN BE SAFETY OBTAINED WITHOUT MOVING OR JARRING THE ORDNANCE.
Article submitted by UXO Guest Author Rick Stauber. For more information on the UXO Guest Author program, click here.
UXO or EOD Technicians involved in photographing and documenting the discovery and disposal of military ordnance will need to prepare a special tool kit containing the following items:
- Notebook (3x5" or larger)
- pencils or a pen with waterproof ink
- 12-inch or larger ruler
- tape measure
- outside calipers
- camera (either a digital or 35mm with a micro i.e., close-up lens)
- small magnifying glass
- small camel hair brush
Identification of military ordnance can be a difficult undertaking. One of the main reasons for this is simply the enormous types and variations of ordnance that have been manufactured over the years and the numerous countries involved in the manufacturing process. The purpose of photographing military ordnance as it's discovered and prior to its disposal is to create a historical record of the discovery and the identification of each item of ordnance.
"A Picture is Worth a Thousand Words"
In the field of EOD, the quote above is a vital element in the day-to-day operations of an EOD or UXO Technician. The better the photograph and the more detail that the photograph contains, the better the ability of not only the EOD Technician but, other personnel military and civilian to positively identify recovered items of military ordnance. To cover the basics of good picture taking of ordnance, a series of real world examples is shown below along with a critique and suggestions on how the photograph can be improved.
Example 1
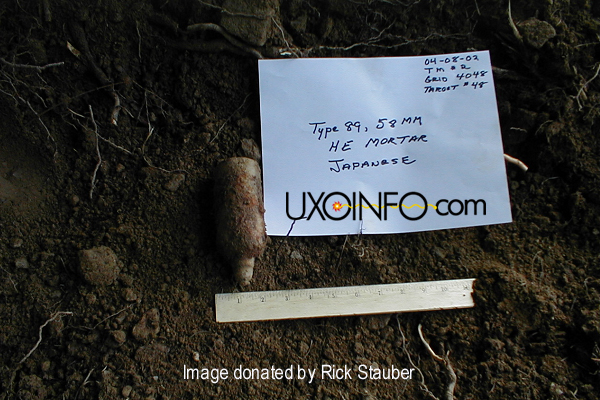
The above photograph is an example of a photographic record of a recovered item of ordnance. It demonstrates a relatively good format that includes a written record of the time date and location of the discovery along with a positive identification of the recovered item which is included as part of the image itself. It also includes a ruler for relative size comparison. A good basic photograph. However, what could be done to improve on this would be a better close-up of the projectile itself with the brightness and contrast adjusted so that projectile is less masked by the surrounding soil. Also, the ruler should be placed along the axis of the projectile body. One other point would be to ensure that the written information does not contain potential errors. Please note that the caliber of this item of ordnance could be misunderstood as a 58mm instead of its correct caliber of 50mm by the way it is recorded, small errors like this should be avoided.
A clear (focused) photograph is a must. The use of modern digital photography allows an individual to review photographs as they are collected. It is highly recommended that the time and effort be taken to insure that the best possible photographs are taken before moving on to the next item.
Example 2
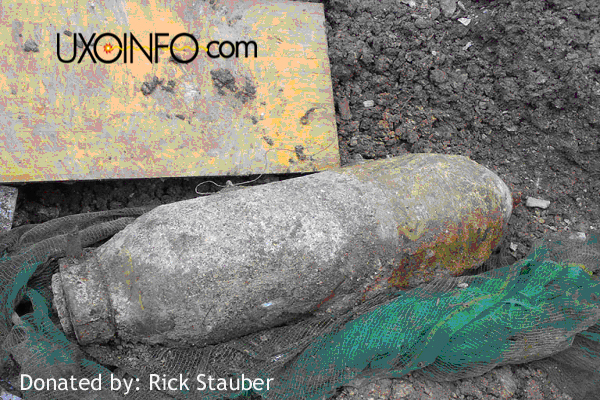
This photograph is clearly on of an old-style General Purpose bomb dating from the WWII time frame. A series of photographs of this item should have been taken to include both the nose and tail to assist in the identification of potential fuzing. All photographs should also include written information as to time and location of the recovery. Each photograph should also have some sort of measuring device present to assist in estimating the size of the item being photographed. In the case of large items of ordnance such as this bomb, a tape measure should be shown next to and along the body of the bomb. Another note relating to photographing bombs is to photograph the measurement (distance) between the suspension lugs to assist in determining the size of the bomb.
Given the technology of digital cameras these days and the amount of memory they can hold, multiple photographs of each munition item should be taken to assist in the identification and recording research information that may become of interest after the disposal of that item of ordnance.
Example 3

The photograph above is of an artillery cartridge case that was uncovered from a WWI battlefield in Europe. The photographs below are of the same item after further investigation by a qualified UXO Technician had ccurred.
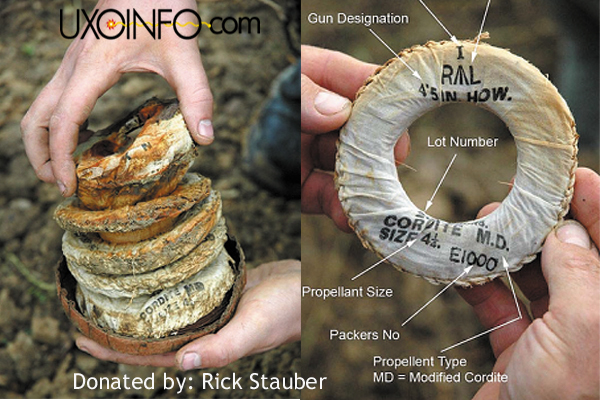
As you can see, the photographs are clear sharp and zoomed in so that the visible markings can be read. In this case, even though the item was buried for over 90-years, the markings are very legible and clear. Keep in mind that items recovered from both WWI and WWII battlefields have in some cases been perfectly preserved.
Example 4
In those cases where it can be done safety by a qualified UXO or EOD Technician, the ordnance should be moved or repositioned so that a series of photographs can be taken to show every detail of the recovered ordnance. Again, only if an EOD or UXO Technician can do it safely, an attempt should be made to clean and re-photograph those same items after cleaning. The example below shows similar fuze types. The one on the left was cleaned and brushed free from dirt where the one on the right was not.
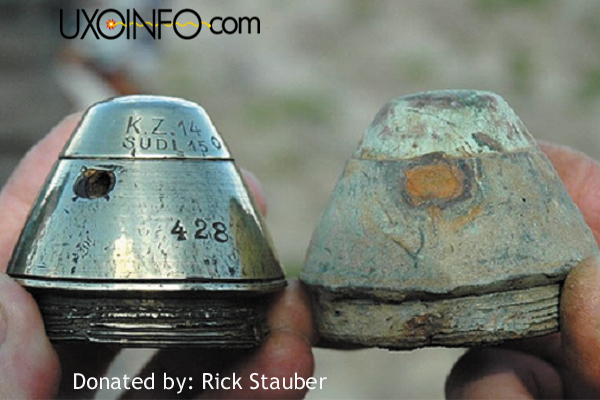
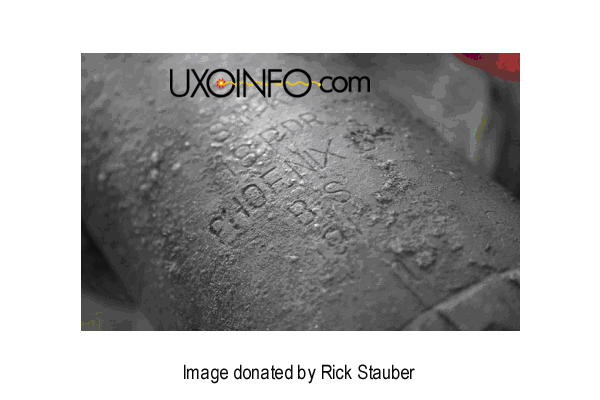
Even after a limited amount of cleaning, important information can be found as shown in the photograph below. While rust and corrosion may destroy painted surfaces, a majority of countries physically stamp or engrave identification information into the metal surfaces.
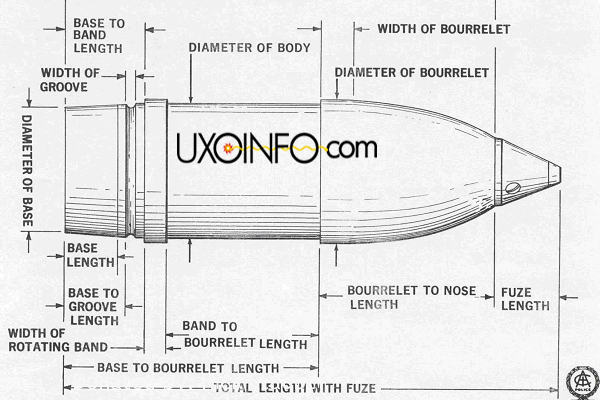
One should always keep in mind that features, color, markings and measurements are often used in the identification process to narrow down the identity of an ordnance item. The figure below shows 15 separate measurements or dimensions of a common projectile that can be used in the identification process. Obviously it may not be possible to capture all 15 dimensions of each and every projectile found but care should be taken to identify and capture as many as possible especially for items that are rare and prove difficult to identify.
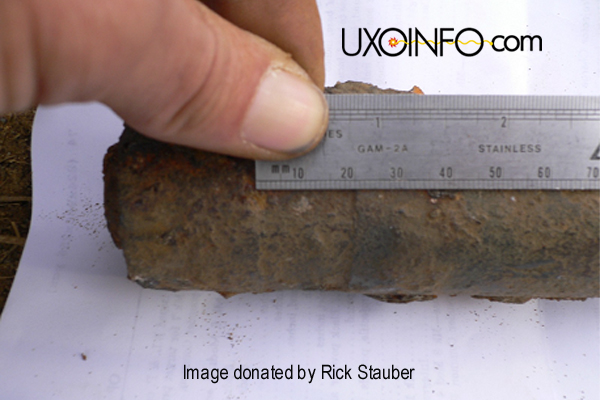
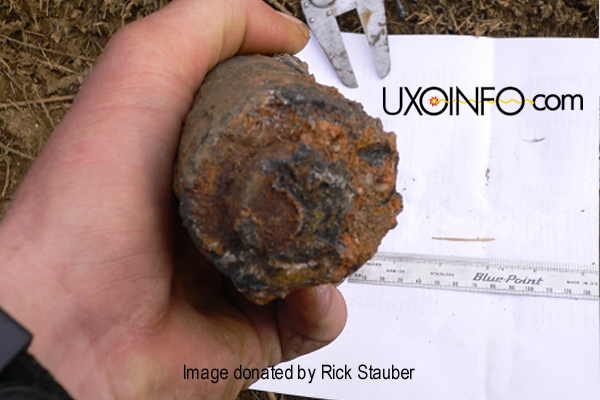
The UXO or EOD Technician may want to use measuring tools such as rulers and calipers to obtain pertinent measurements for identification purposes. The two photographs below show the tools in use. Note the presence of an outside caliper which is an important tool for use in obtaining the size (diameter) of a particular item of ordnance.
Example 5
A complete series of photograph along with recorded information must be goal of every individual (military and civilian) that works with military ordnance. An example of a series of photographs taken on a single UXO is shown below.
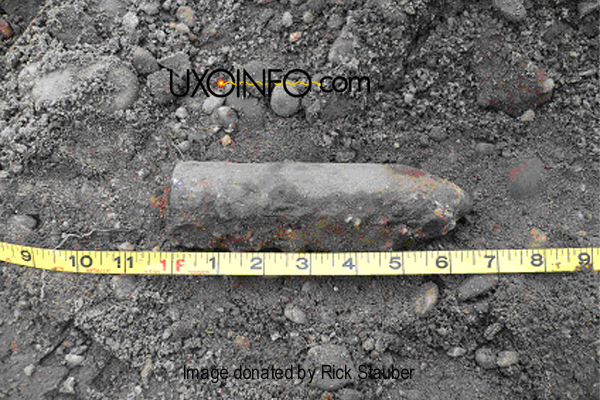
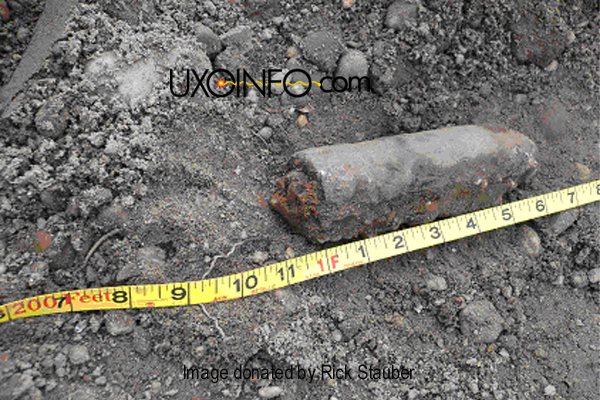
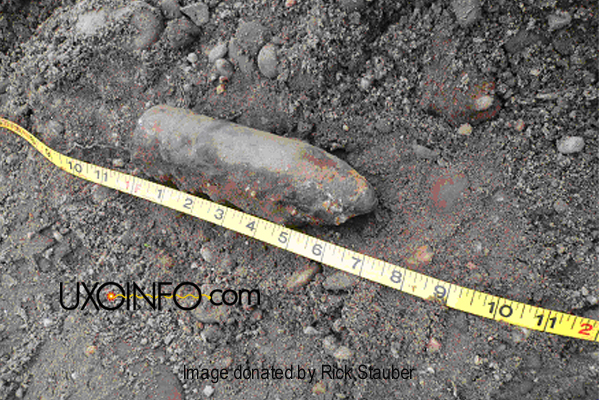
The three photographs above are clear and are in focus and provide a series of views from multiple angles including the nose and tail sections that would assist in the identification process. In this case the UXO Technician decided for safety reasons not to move or relocate the item. Remember, only a qualified EOD or UXO Technician should handle or move ordnance. Although multiple angles are taken of the UXO in this example, what is missing is a white board or post card showing the date, time and location of discovery. This information can be captured in a log book but then the page or section of the log book should be scanned and attached to the image file (using photoshop or another imaging editing software). This of course is very time consuming and cumbersome.
Formats, File Naming, and Other Helpful Hints
- Use a consistent image format or file format. Tiff images typically are a higher quality than .jpg or .gif images.
- Set the camera up so that the image size and resolution is consistent among pictures. Usually a higher resolution is better.
- Keep a log book of the images taken including location, image name or number, photographer, time of day, and other information that may be useful.
- Develop a database or electronic log file of the images and associated meta data (e.g., project name, date/time, location, photographer).
- Name the images so that they can be easily tracked or organized. For example, if you take 5 images of the same ordnance at varying angles, use similar naming convention for the images (i.e., 60mm-M69-Nose, 60mm-M68-tail....).
- With the permission of the client or project sponsor, email a copy of the ordnance images to UXOInfo.com for posting in the UXO Photo Gallery. This way the images can be shared to broaden the knowledge base across the industry. Image donations can be sent as an attachment to information@uxoinfo.com.
© Copyright 2009 UXOInfo.com


